

How To Paint One Stroke Santa Claus
Learn how to paint a whimsical jolly Santa on a ten″ x xx″ canvass with acrylics paints.

On this painting I as well added some fun glitter to the hat for an extra sparkle! Adding glitter to acrylic painting is very piece of cake! I employ a gloss gel medium every bit an adhesive, notwithstanding, you can use anything that dries clear such equally a clear gum.

You can also customize the groundwork on this! I almost did the background with a pretty low-cal green only opted for the pretty turquoise.
When selecting a background colour, I recommend a color that will "contrast" or stand out from the bright red of Santa'due south Hat. Choose any color plus titanium white (the white gives it that "2 toned await").
Enjoy and happy painting!
Materials
Agile Time 1 hour 30 minutes
Total Time 1 hour thirty minutes
Difficulty Easy
Instructions
- See tutorial on world wide web.stepbysteppainting.internet for total pace by pace directions!
Notes
You can do this on whatsoever size canvas! Just modify the design so the hat isn't so alpine.
This tutorial is too in my PDF Store!
Color Palette

Directions At A Glance

Traceable
I will also show y'all how to draw the Santa! The traceable is not required.

Video
Step By Step Directions
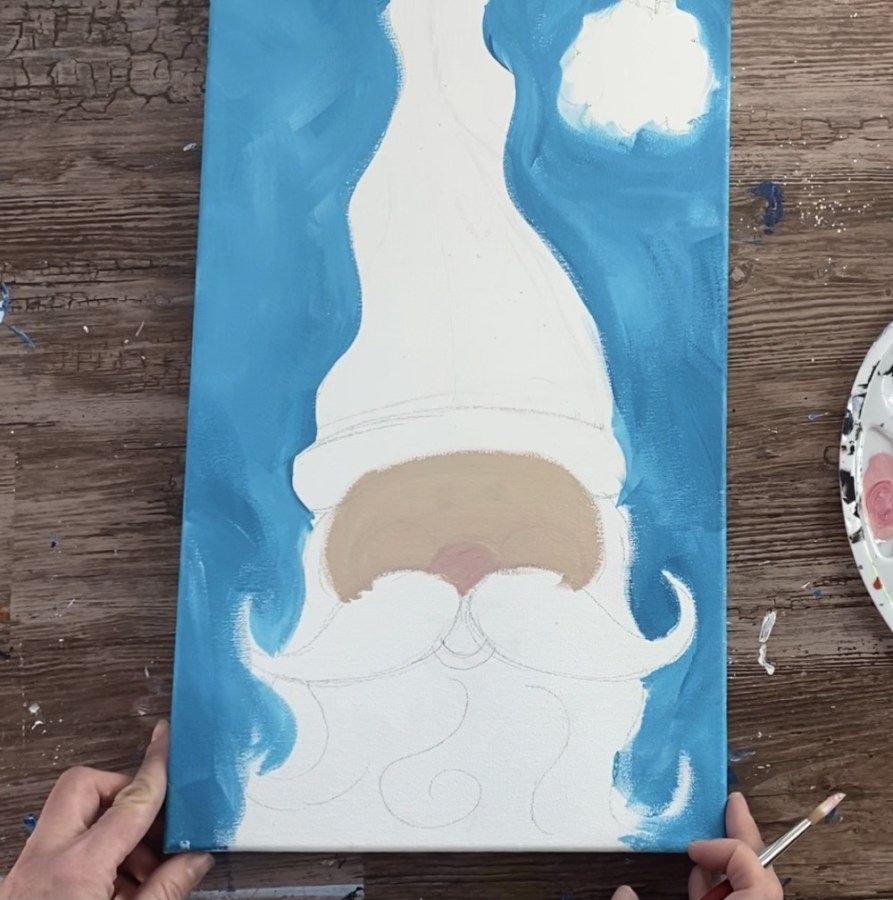
1. Draw the Santa
On the 10 10 20 canvass, mark the v″ mark from the lesser. This is well-nigh where the tiptop of Santa'south mustache will exist and will assistance you get the placement of the cartoon.

Draw the mustache under that 5″ line mark.

Next draw the nose above the mustache.

So draw his rima oris by cartoon 2 curved lines nether the mustache.

Next describe his cheeks. Draw 2 curved upside down semi-circle lines to the left and correct of his olfactory organ.

So describe his eyes and bottom function of his lid.

Then draw the curved lines on the side of his head under his chapeau.

Continue those curved lines downwards to form his beard. Some of the lines can get screw if you desire Santa to have a curly beard.

This picture below came out kind of blurry. Then draw his chapeau so that information technology goes kind of wavy and bends downward. Describe the white puffy ball at the tip of his hat.

2. Pigment the background
For the background, I used a three/4″ flat launder brush and two colors: turquoise blue and titanium white. This is where yous can customize your background! If you don't want to do turquoise, choose a color that volition stand up out against Santa'due south bright red hat.

Double load your brush in both turquoise blue and titanium white. Use your 3/four wash brush to paint the background all effectually your Santa cartoon. Let the blue and white blend together to create a two toned "color variation" blend in the background.

I had my strokes go in all dissimilar directions and sort of contour and angle around Santa'due south chapeau and head.

You can blend the white and turquoise every bit much every bit you want. Or y'all can have "pops" of bright white in some places. It's upwards to y'all! Just brand sure you fill upward as much as that negative space equally possible around Santa. Too, paint the sides of your canvas if you are working on a stretched canvas.

3. Pigment Santa'due south Face up
For this colour, I used "unbleached titanium" and mixed a tiny bit of "alizarin cherry-red hue" into information technology to brand the colour more "rosy".
*If you desire to run into a Smashing tutorial for mixing skin colors, cheque out Jasmine'due south Tutorial "How To Brand Skin Colour Paint in Acrylic". Absolutely Honey this tutorial!

I used a #8 round brush to paint his face up. I did have to paint over the optics, cheeks and nose just yet kind of saw the cartoon through the paint.

For the nose, I mixed some more "alizarin crimson hue" into that tan color so that information technology would stand out.

Then I painted the olfactory organ in with that colour.
For the cheeks, I used my fingers! Dip your index finger in a little bit of alizarin carmine hue (just a petty bit, wipe if off if y'all take too much). And paint his cheek. Printing and kind of course a circle.

It's okay if your circle overlaps that mustache. We will be painting over information technology later.

If your cheeks are a picayune "too rosy" you can ever add together some more than of his flesh color over it to "tone information technology down a fleck".

Then paint his optics! Use mars blackness and a #iv round castor (or whatsoever pocket-sized round brush).

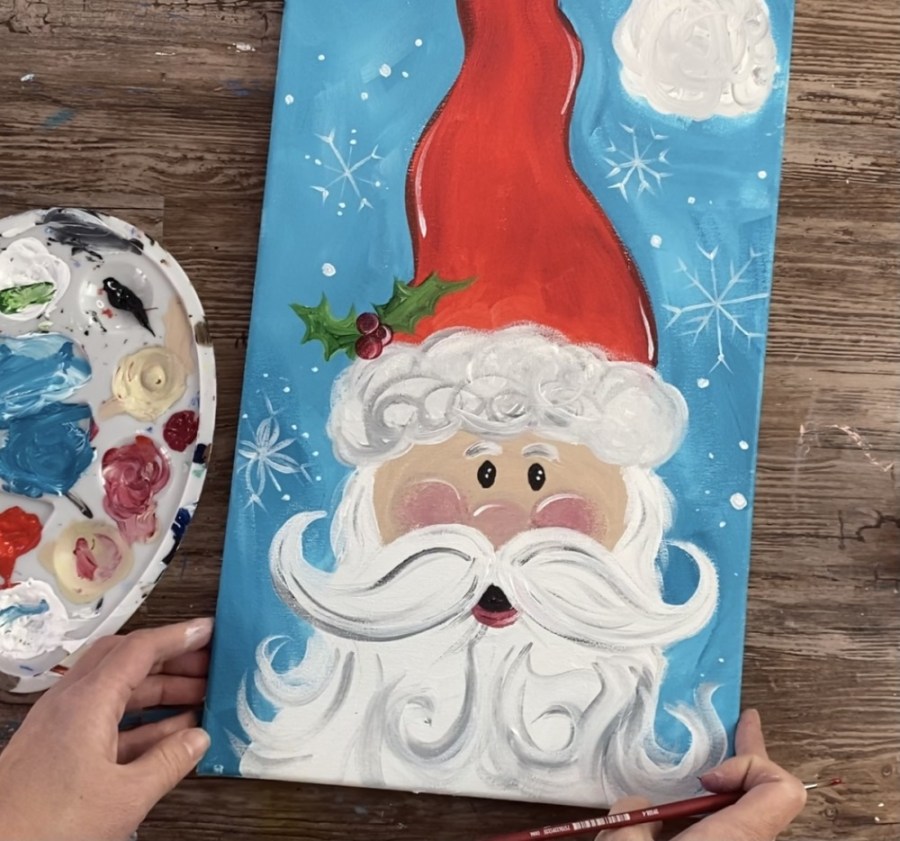
4. Paint Santa'southward Bristles
Side by side paint his bristles! His bristles is a combination of titanium white and tiny $.25 of mars black so the texture volition show upward.
Use a #8 circular brush and paint a coat of titanium white on his bristles offset. Brand certain your strokes are "contouring" and going in a curved management going with the flow of his mustache and beard.

So add a tiny chip of mars blackness onto your castor. Alternatively, yous can mix black with white on your brush to brand a gray. Paint strokes on the bottom of the mustache and sort of blend it with the white.

So add some more than of that gray in his beard. I had my Santa's beard be curly and so I did several spiral strokes.


Then I painted his eyebrows. Start a glaze of white and so add some gray streaks in those as well.

Also paint two dots inside his optics.

Then paint the fluffy function of the hat. Use a #8 round castor and paint it a coat of white. And then add a touch of black into it (and so information technology becomes grayness). Paint circular strokes so that it looks "fluffy".

v. Paint Santa's Chapeau
For the lid, I did a solid coat of cadmium carmine medium hue. This is a really bright red color. I also used a 3/4″ flat wash castor.


To add some different "color variation" to the chapeau, I blended in some areas of the red with "alizarin crimson hue" (that darker red).


So paint his mouth. Utilise alizarin crimson hue and a trivial fleck of the unbleached titanium color. Utilise your #4 round brush to paint his mouth shape.

If you desire him to look like his mouth is open up, paint the upper role of it mars blackness.


Then add some highlights. Paint a sparse white line on the summit of his cheeks and olfactory organ.

Then pigment the fluffy part of the tip of this hat with titanium white and a #8 circular brush.

Use a #4 round brush and titanium white to add some highlight on his hat in some areas.

6. Pigment Snowflakes
To paint the snowflakes, use a #four round brush and titanium white. Use the very tip of your castor to paint the lines of the snowflakes and then they go in an asterisk. Then add together dissimilar designs onto the snowflake.

You tin besides do spirals in the dorsum and add together piffling dots for the snow.


Note: I did this painting twice so some of the pictures look a little different.


7. Paint the Holly
Use a #4 round brush and hookers greenish hue permanent. Note: if the light-green doesn't evidence upwards, add a bit of white to it to lighten the dark-green. Paint the holly leaves first and so the berries.

After the dark-green dries, paint the berries. Paint them small circles with alizarin crimson hue with a little bit of titanium white. Add together white on one side of the berries for the highlight.
viii. Add Glitter
To exercise the "glitter", I added a "gloss gel medium" every bit an adhesive. This works well for getting the glitter to stick. Y'all can too use glue that dries clear.
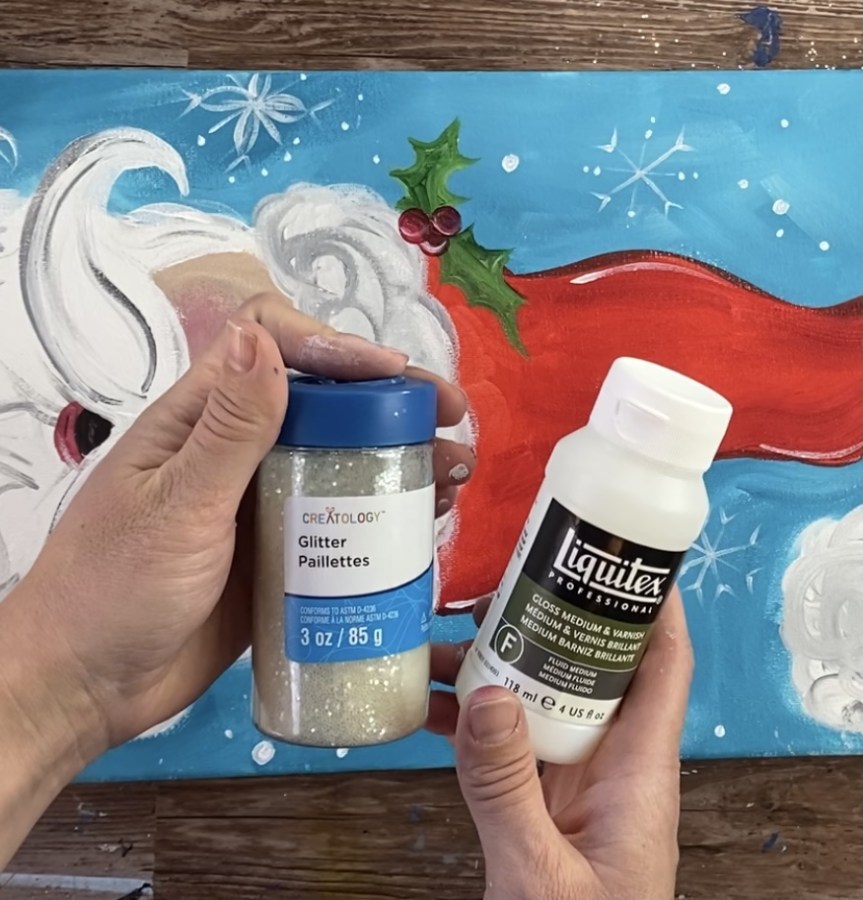
Apply the gloss medium where yous want your glitter to stick. I did mine on the puffy ball of his chapeau and on the fluffy part of the base of his hat. Use whatsoever brush to apply the medium.

Then apply the glitter to the gel rapidly before it dries and gently castor off the excess.


You can too add some glitter to the background on some of the snowflakes. I found that the large glitter I used wasn't equally effective for the small snowflake areas. A fine glitter would have worked better for that area.
Finished!
This was such a fun painting! I concluded upwards painting two of them (both slightly different). Sign your name and show information technology off!

Share Your Fine art Here!


Source: https://stepbysteppainting.net/2020/12/09/santa-painting/
Posted by: honakerfuleat.blogspot.com
0 Response to "How To Paint One Stroke Santa Claus"
Post a Comment